
Are you thinking about starting a butterfly garden? Are you looking for inspiration, or ideas? In this article, I’ll explain how we started our butterfly garden, and what we’ve learned along the way. One thing that I should note is that we live in the upper Midwest of the United States. While most of this article focuses on the design and building our our butterfly garden, I do mention the seeds we used the first year. Depending on where you live, those seeds may or may not be available in your area.
Picking Out the Perfect Spot for Your Garden
If you are interested in starting your own butterfly garden, the most important thing to consider is location. Butterflies, and most of the plants that you will be considering planing in your garden like the sun. Since butterflies are cold-blooded insects, which means they are incapable of regulating their own body temperature, they rely on the warmth of the sun to keep themselves warm. If their body temperature is too low (around 50 degrees Fahrenheit), they are unable to fly. The plants you choose for your garden will tend to require full sun, which is 6 or more hours of sun per day. When you’re picking out an area around your house to start your garden, the key is to find an area that gets at least 6 hours of sun per day. If you have an area in mind, but are not sure if it gets enough sun, watch it for a day or two. Find out when the sun shines on the area in the morning or early afternoon, and when the sun leaves the area. How many hours of sun does the area get? If it’s 6 or more, you’ve got a good spot.
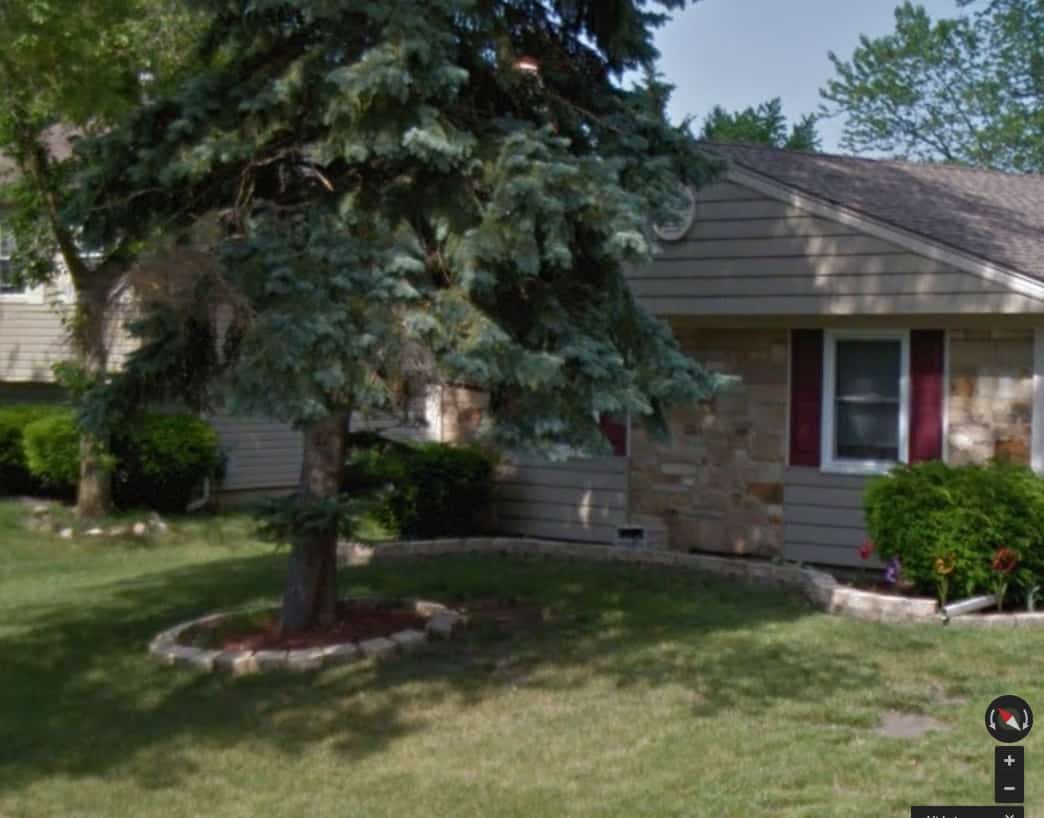
When we bought our house, there was a tall pine tree in the front yard. A couple of years after moving in, I started noticing a strange smell around the pine tree. The only way that I could describe the smell was that it smelled like a distillery. If you’ve ever done the Jack Daniel’s distillery tour in Tennessee, that is what it smelled like. We had a local tree service company come out and take a look at the pine tree, and they confirmed that it was sick and dying, so we decided to have it removed. Here are some before and after pictures:
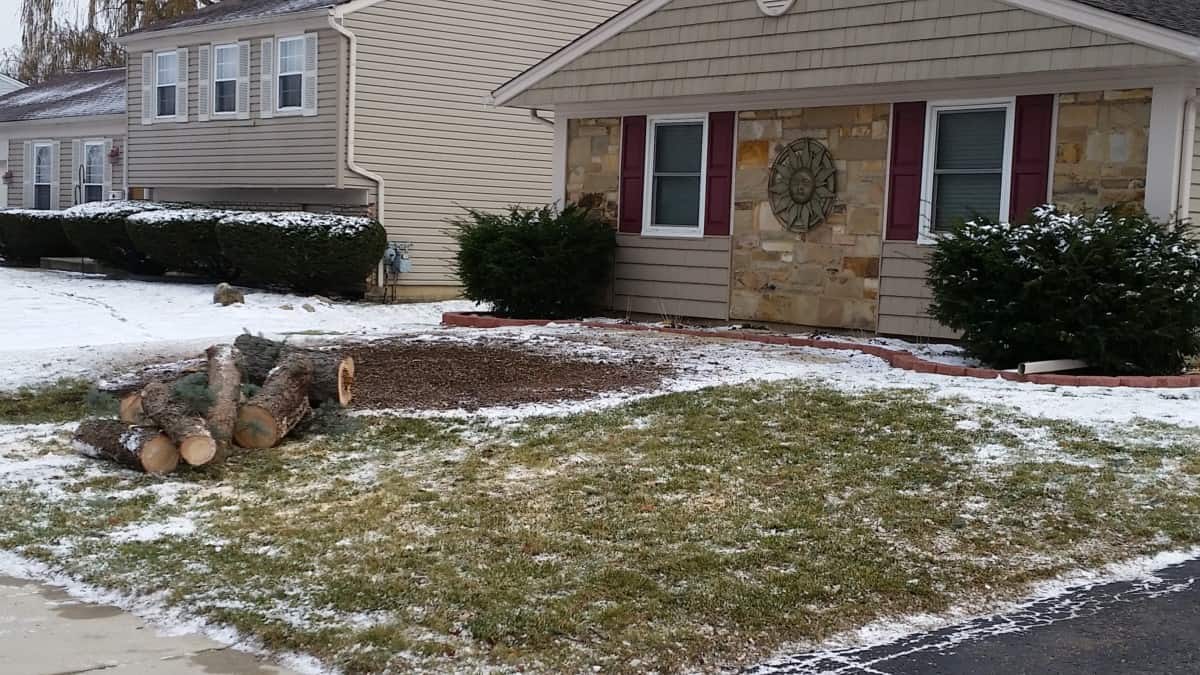
After the pine tree was removed, I was left trying to figure out what to do with the bare area. As you can tell from the bottom picture, it was winter so I had time to think about it. Should I just put down some grass seed and make it a part of the lawn? Nope, I’ve got a much better idea! We had lost our first child during pregnancy from a chromosome abnormality called Trisomy 18, so instead of filling the area in with grass, I decided to turn the area into a memorial butterfly garden. I had thought about creating a butterfly garden in the past, but it wasn’t until the pine tree was removed that I had the perfect spot for it. As I mentioned earlier in the article, you need a spot with at least 6 hours of sun per day for a butterfly garden. Our back yard faces the east, and with the trees we have back there, there isn’t an area that gets enough sun during the day. With the pine tree removed in the front, however, we now had the ideal spot for a butterfly garden! With the front of our house facing west, it starts to get sun around 10 or 11 am, and continues to get sunlight until about 6 or 7 pm. Perfect!
Designing the Garden
After finding the perfect spot for your butterfly garden, the next step is coming up with a design. Envision what you want the garden to look like. If the area you have picked out is smaller and has a square or rectangular shape, there is not much thought that needs to go into the design. In my case, I had a decent size area to work with. And because it was in the front yard where people would see it as they drove or walked by, I wanted to make it look nice. So I got out my tape measure, grabbed a satellite image of the area from Google Maps, and started sketching out a rough plan on graph paper.
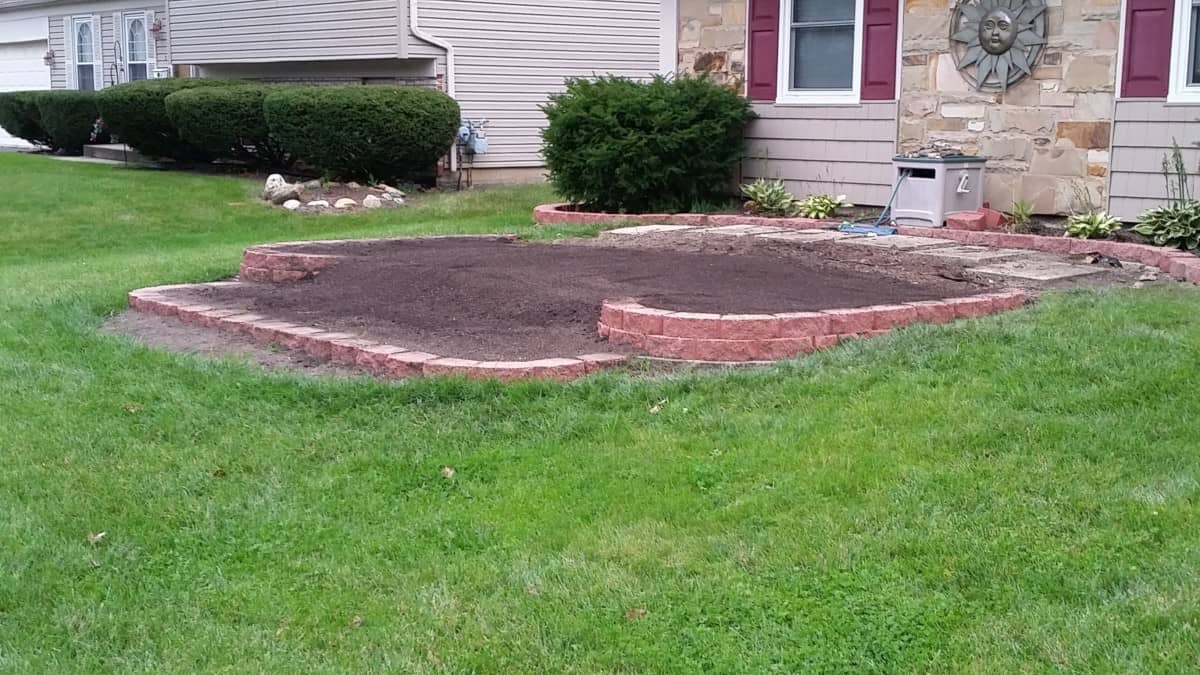
As soon as the ground thawed in the spring, it was time to get to work and start building the garden. I could have just carved out the area according to the design that I had come up with and started planting, but anybody that knows me knows that I tend to go a bit overboard. Whenever I have a project to do, I rarely (if ever) do the bare minimum to get it done. I tend to go a bit overboard. The butterfly garden was no exception. As you can see from the “after the pine tree was removed” pic above, we had red retaining wall blocks around the front of the house (in front of the bushes). I thought it would look nicer to use those same retaining wall blocks around the garden, so I did.
Start Digging
NOTE: Before you start digging, I recommend you put a call into your local utility location service and have them check the area for any electric, communication, water, or gas lines. The last thing you want to do is inadvertently hit a utility line! In our area, we just need to place a call to JULIE by calling 811, or submit a request online. Depending on where you live, there might be another company that provides this service. It usually takes JULIE a couple of days to come out so plan accordingly. They use special tools, that can detect the presence of underground utilities and will mark the area with color coded flags if any utilities are detected. Each color represents a specific utility. For example, red is electric, yellow is gas, blue is water, and green is sewer.
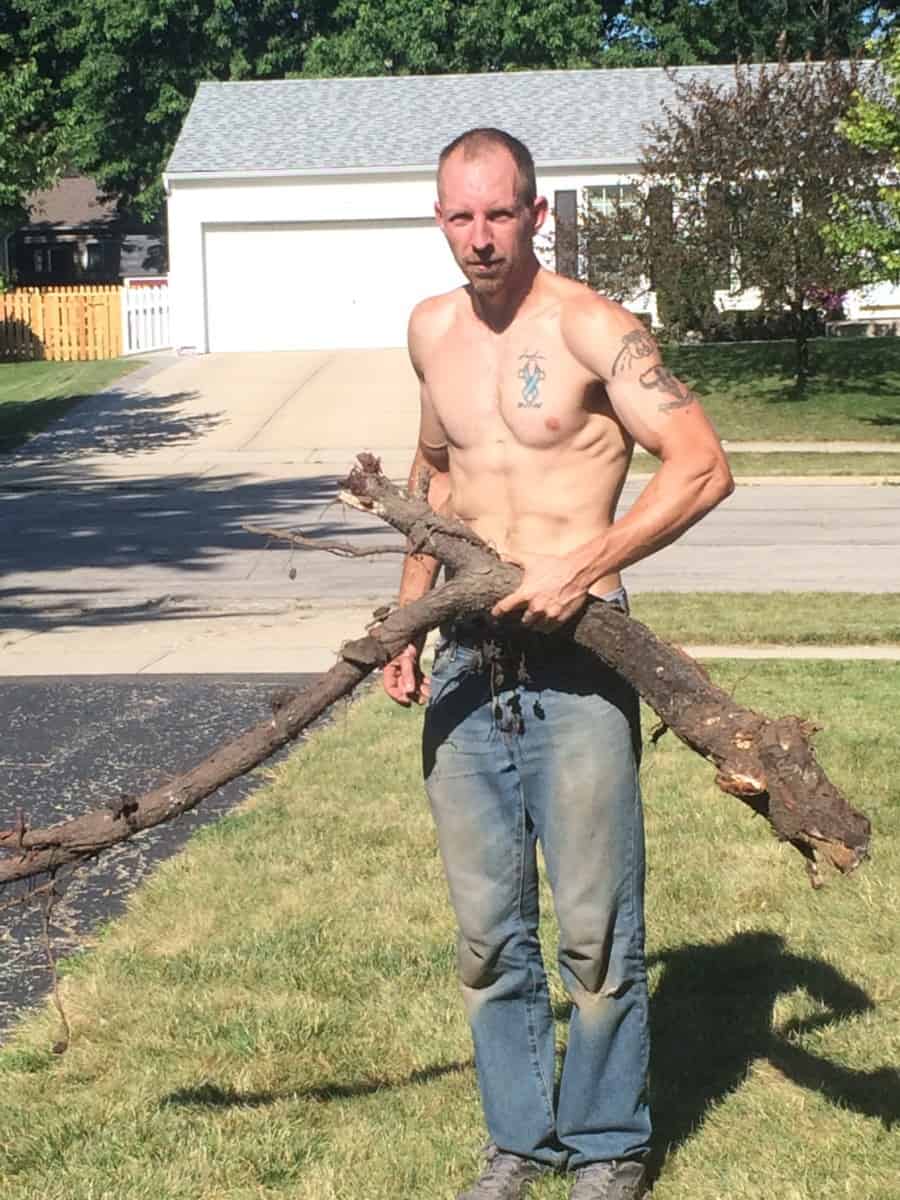
I was fortunate that there were not any underground utilities in the area that I wanted to use for the butterfly garden, so I was free to start digging. The company we used to remove the pine tree did grind down the stump, but they did not remove all of the roots, so my first major task was to start digging out the roots. Here is a pic of me with one of those roots:
After all (or most) of the roots were removed from the area that would become our butterfly garden, it was time to start digging a trench for the retaining wall blocks. If you have never installed a retaining wall before and are thinking about it for your garden, here is a link to a YouTube video of the process: How to Build a Retaining Wall. There are also lots of “how to install retaining wall” articles online that can provide you with instructions on how to do it. I have installed retaining walls a couple of times, and I can tell you that it is quite a bit of work, but I think the finished look makes it worth it.
Our front yard slopes away from the house, so I could have used the “step” method of installing the retaining wall blocks, but instead I chose to dig a level trench all the way around. Using the “step” method wouldn’t require as much digging or blocks for the retaining wall, but I thought I would run into some difficulty trying to get the stepping just right so that the wall would be level when I was finished. The previous owner of our house had used gray retaining wall blocks around the front of the house that I had previously replaced with red blocks. I decided to reuse the gray blocks for the lower layers of the butterfly garden retaining wall that you wouldn’t see. Unfortunately, I don’t have any pictures of the process of building the retaining wall, but here is a pic of the finished wall:
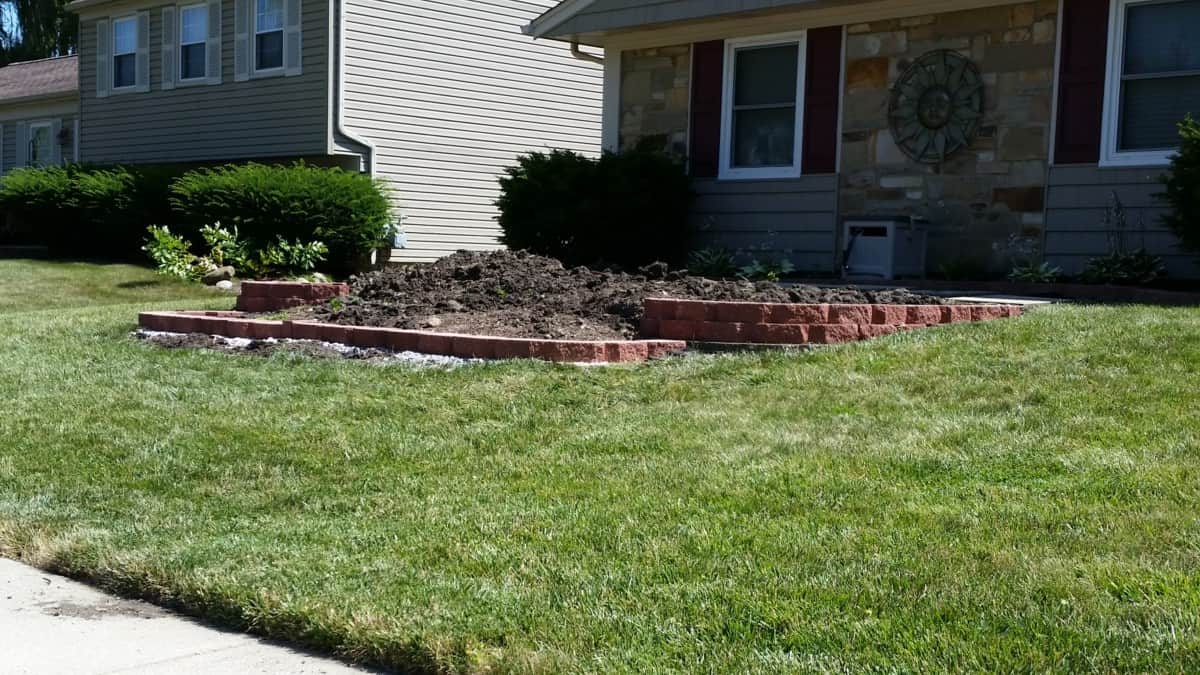
The pile of dirt inside the retaining wall is the dirt that was removed from the trench that I dug for the retaining wall. This was later removed to make way for fresh (and clean) dirt. By “clean” I mean dirt that wasn’t full of rocks, sticks, and other miscellaneous stuff. The other thing I found as I was digging out the trench for the retaining wall was that there was lots of clay in the soil. I wanted to make sure anything I planted in the butterfly garden had the best possible soil for the roots, so in addition to removing the pile of soil that was removed to make way for the retaining wall, I also tilled the soil down about 8 inches and removed any other rocks, sticks, and clay that I found. I didn’t have access to a tiller or a way to get one home from the rental store, so I bought a hand tiller at our local home improvement store. It is similar to this. I will admit that this was a lot of work, and my arms were sore for a few days afterwards, but it did get the job done.
After tilling and adding some new garden soil that I picked up at our home improvement store, here is the finished product:
At this point, it might look like the garden is done and ready to be planted, but I had a little more work to do. As I mentioned earlier, I have a tendency to go a bit overboard on some of my projects, and this was no exception. While I was walking through the garden center of our local Menards, I came across a cute little bench that I thought would be a nice decorative touch to the garden. I couldn’t just put the bench on the dirt, so I added a little “patio area with patio blocks.
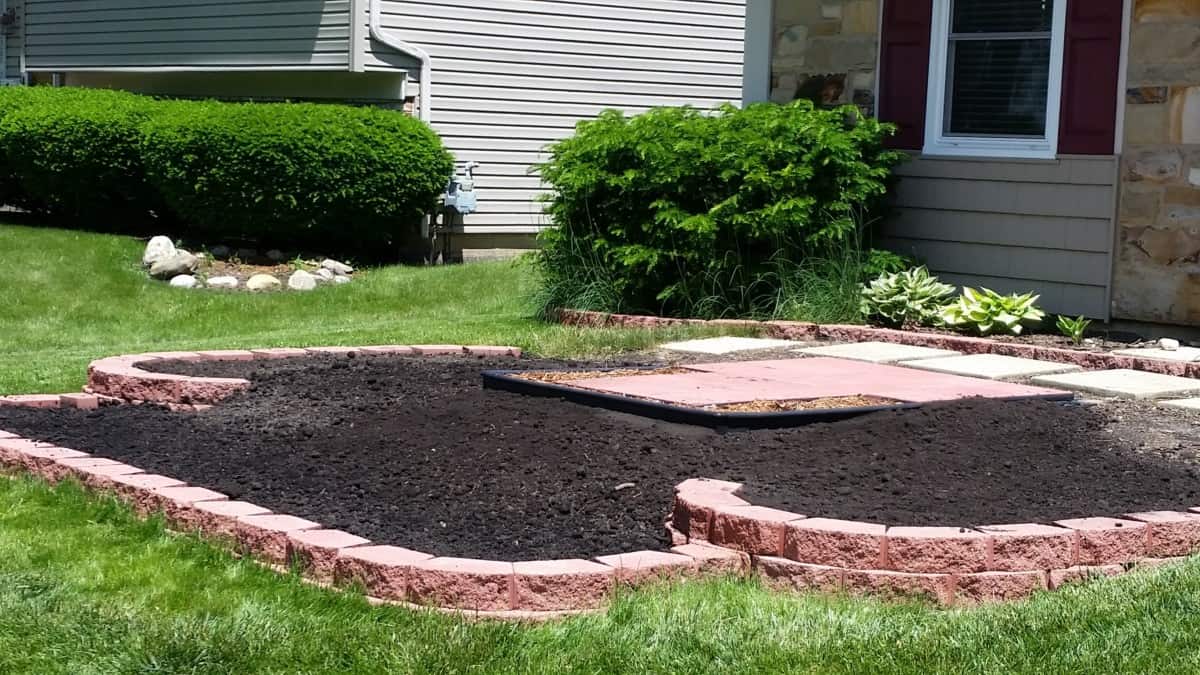
For the patio block install, I used Brock Paver Base Panels instead of the usual paver base stone that you can find in bags at your local home improvement store. This was my first time using these panels, and I have to say that it made the patio block install so easy.
You might have also noticed that I added an additional layer of blocks to the retaining wall. I think it makes it look nicer. It also allowed me to add additional soil and even out the slope from the top level to the bottom.
Time for Planting
Now that the retaining wall is completed, soil is tilled, “patio” is installed, can we start planting? YES, but there was one more question we needed to answer first. Are we going to plant by seed, or are we going to buy plants? We decided to go with seeds. Our local Menards sells a “Wildflower Butterfly & Hummingbird Mix”, so I bought a bag of it. For $6.00, seemed like a cheap and easy way to get the garden growing. If you don’t have a Menards in your area, your local home improvement / garden center might have something similar. Or you can buy it from Amazon. After the seeds were sprinkled throughout the garden, the only thing left was to water them. The trick is to keep the soil and seeds moist so that they germinate, but not soaking so they rot. Depending on temperature, this might require you to water multiple times a day. Remember that you just want to keep them moist, not drenched.
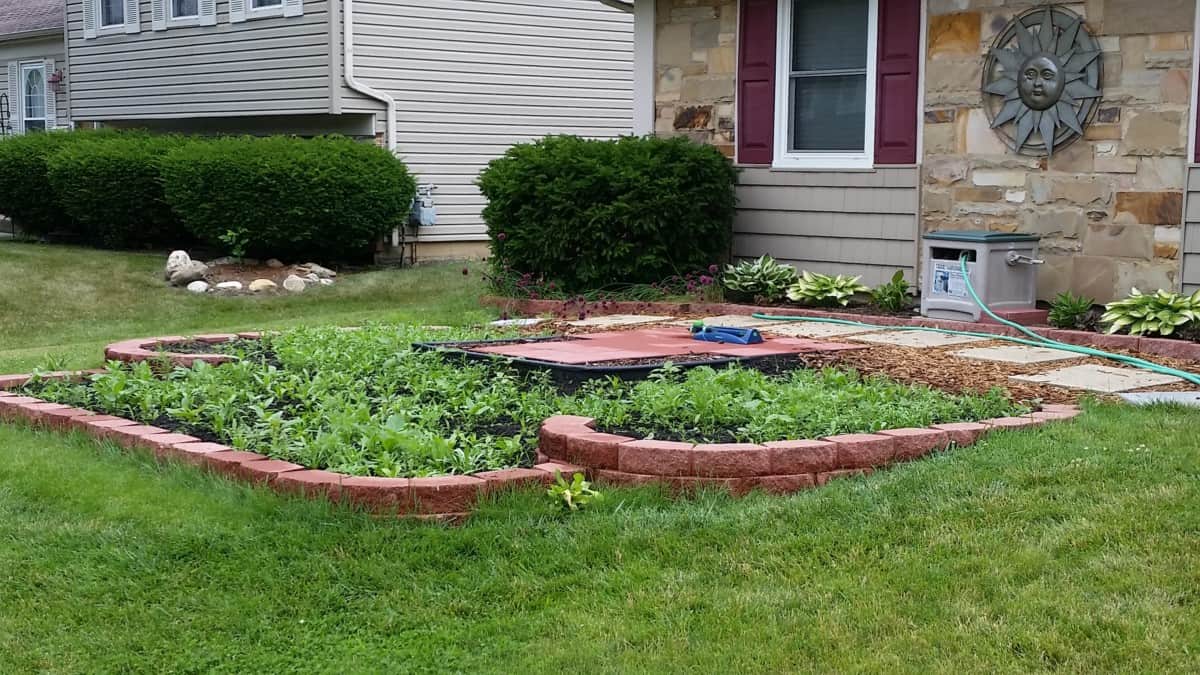
After a couple of days of watering, we started getting our first sprouts, and we were excited. We were looking forward to see what our garden would look like with all of the flowers blooming, and to see if we would have any butterflies visiting. This picture was taken about 3 weeks after the seeds were first sprinkled in the garden:
Looks good so far, doesn’t it? I had an idea of what flowers I could expect to grow from the seeds, but I couldn’t tell what was what from looking at the sprouts. That became a bit of a problem. We had some plants growing in the garden that turned out to be weeds. We had one weed that grew to about 6 feet tall before we realized it was a weed and pulled it. We had numerous other weeds in there. I don’t know where the weeds came from. I don’t know if they came from the “Butterfly and Hummingbird Mix”, or if they were in the soil that I added to the garden, or if they were in the soil around the pine tree just waiting for the perfect growing conditions. Without know if the weed seeds came from the seed mix, I can’t say anything negative about the mix. Ultimately, I think the garden turned out nice that first year. Unfortunately, there are mostly annual seeds in the seed mix, so the plants will only last 1 growing season and then die. Then you will have to reseed the following year. Another con of using a seed mix is that you don’t get to pick and choose what plants are in your garden, or where each plant is located in the garden. But if you’re looking for something quick and easy, the bag of seeds might be an option for you. Here is what our garden looked like about 2 months later:
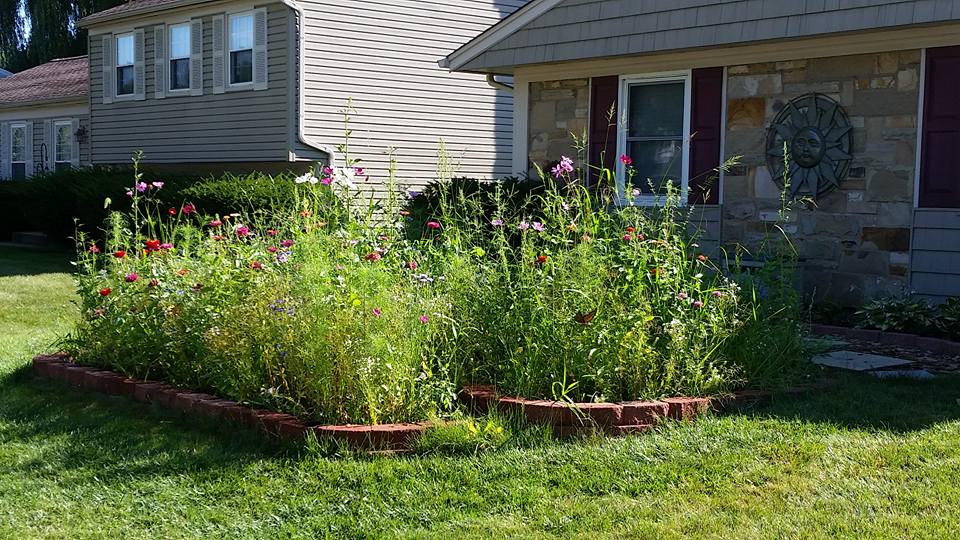
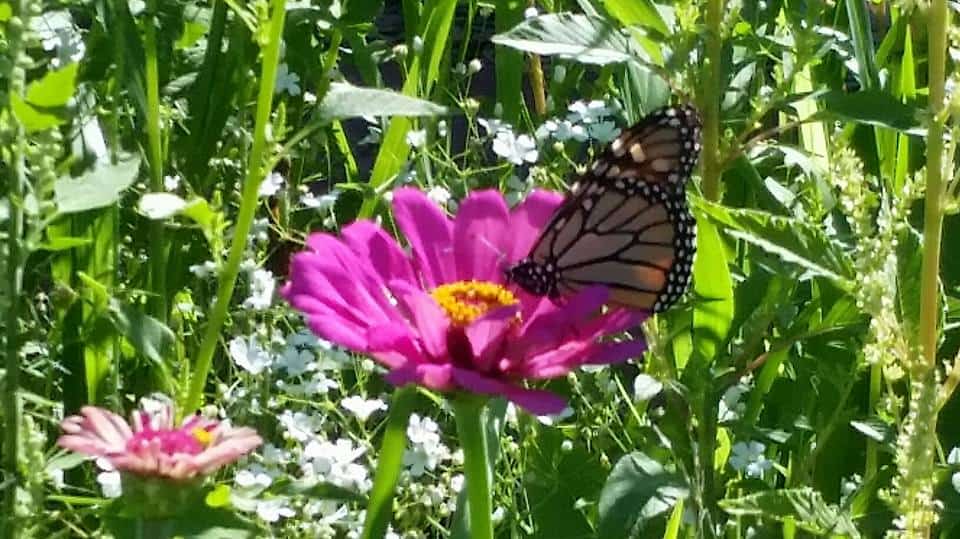
I don’t think it looks bad. It’s got that wild prairie look to it. But if you look close enough, you can see some grass and weeds that grew taller than then flowers in there. And judging by the visitor that was drinking nectar out of one of the flowers, I would say it was a successful first attempt at a butterfly garden:
So that was our first attempt at our memorial butterfly garden. While I do think it turn out successful, judging by the butterflies and birds that came to visit it, I ultimately decided to go in a different direction the following year. I decided to still use seeds instead of plants (to keep costs down), but I wanted more perennial flowers than annual flowers. I wanted more of a plant it once and forget it kind of garden. By buying individual seed packs, it would also allow me to pick out exactly which flowers were in the garden, and also arrange the flowers the way I wanted it. With the butterfly and bird mix, I did not have that option. I had no idea which flowers would grow where.
I hope you enjoyed this post and are coming away with a feeling of what can be possible with a little bit (or in my case, a lot) of work. If you are planning on starting a butterfly garden, you don’t need to go overboard like i did with the retaining wall and patio blocks. While it looks nice, and I’ve gotten several compliments from neighbors, the butterflies don’t care about the aesthetics of the garden design. The only thing they care about are the flowers. As long as they have nectar to drink, they will be happy.